Creating black & white images with LAB
Everyone loves a good black and white photograph, they have an immediacy and elegance that’s hard to resist. But converting a color photograph to grayscale in Photoshop will often produce a lackluster result. Here’s a tip for creating black and white images that really come to life.
In this tutorial we will be using the often overlooked LAB color space. If you’re anything like me then you do the majority of your image editing work in either RGB or CMYK color mode, which are both fairly straightforward to get your head around. The LAB color space is a different kettle of fish altogether. Like RGB it consists of three channels, but in this case they are Lightness (L), colors ranging from red to green (A) and colors ranging from blue to yellow (B). Kinda confusing, huh? Anyway, lets see how the LAB mode can make our black and white images zing with just a few simple adjustments.
Here is our original image:
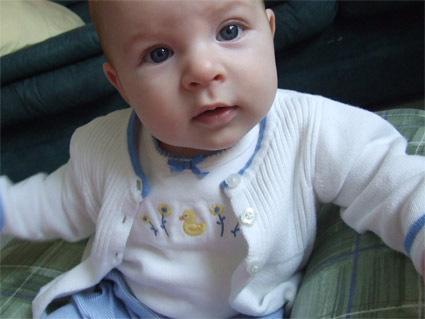
The quick n’ dirty method for converting this image to grayscale would be simply to choose Image > Adjust > Desaturate from the Photoshop menu. Viola, our image is now black and white. However it looks a little flat. Untouched photos are often quite tonally dull, and suffer the most from the standard Photoshop desaturation technique.
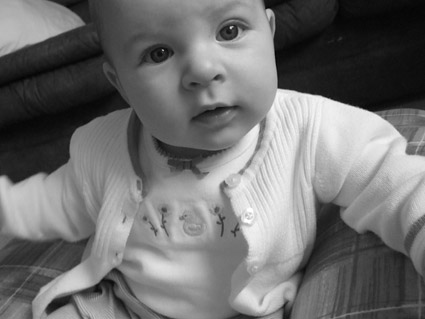
Lets try the LAB method instead. We’ll start with our original color image, then choose Image > Mode > LAB Color from the Photoshop menu to convert the image to LAB mode. Next, click on the channels palette, and hide the A and B channels, to leave only the Lightness channel showing.
Straight away you should notice an improved tonal range.
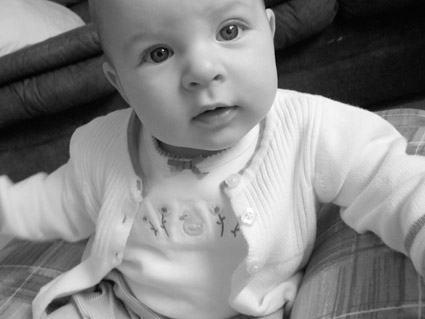
Now it’s just a matter of adjusting the images levels or curves to tweak the image to your liking. I’m going to use curves, and pull the sliders in a little at each end to give the image more contrast.
All that’s left to do is convert our image to grayscale mode by choosing Image > Mode > Grayscale from the Photoshop menu. Here is the final image:

I think it’s fair to say that our new image is a big improvement over our original effort, and took only a few moments longer to produce. This method won’t produce stellar results every time, but if you find your black and white conversions lacking life then it is definitely worth a whirl.
Because the LAB color mode contains all tonal information in a separate channel, it is also great for sharpening images, and adjusting levels and curves, without messing up your color information. I will cover some of these other techniques in future articles.
Photo credit: Photo by Sean Ratke, available on stock.xchng
3 thoughts on “Creating black & white images with LAB”
Comments are closed.
I’ve always had good results using channel mixer to convert an image to black and white, but this seems interesting, too
@dan: I think you’re correct that the channel mixer is probably the best way to convert images to grayscale as it gives you the greatest level of control, but does require some experimentation with the values of each channel. What I like about the LAB method is that it’s virtually a one click technique. If anyone wants to find out about the channel mixer method, here are some Google results to get you started.
Great little tutorial will have to try this out.